
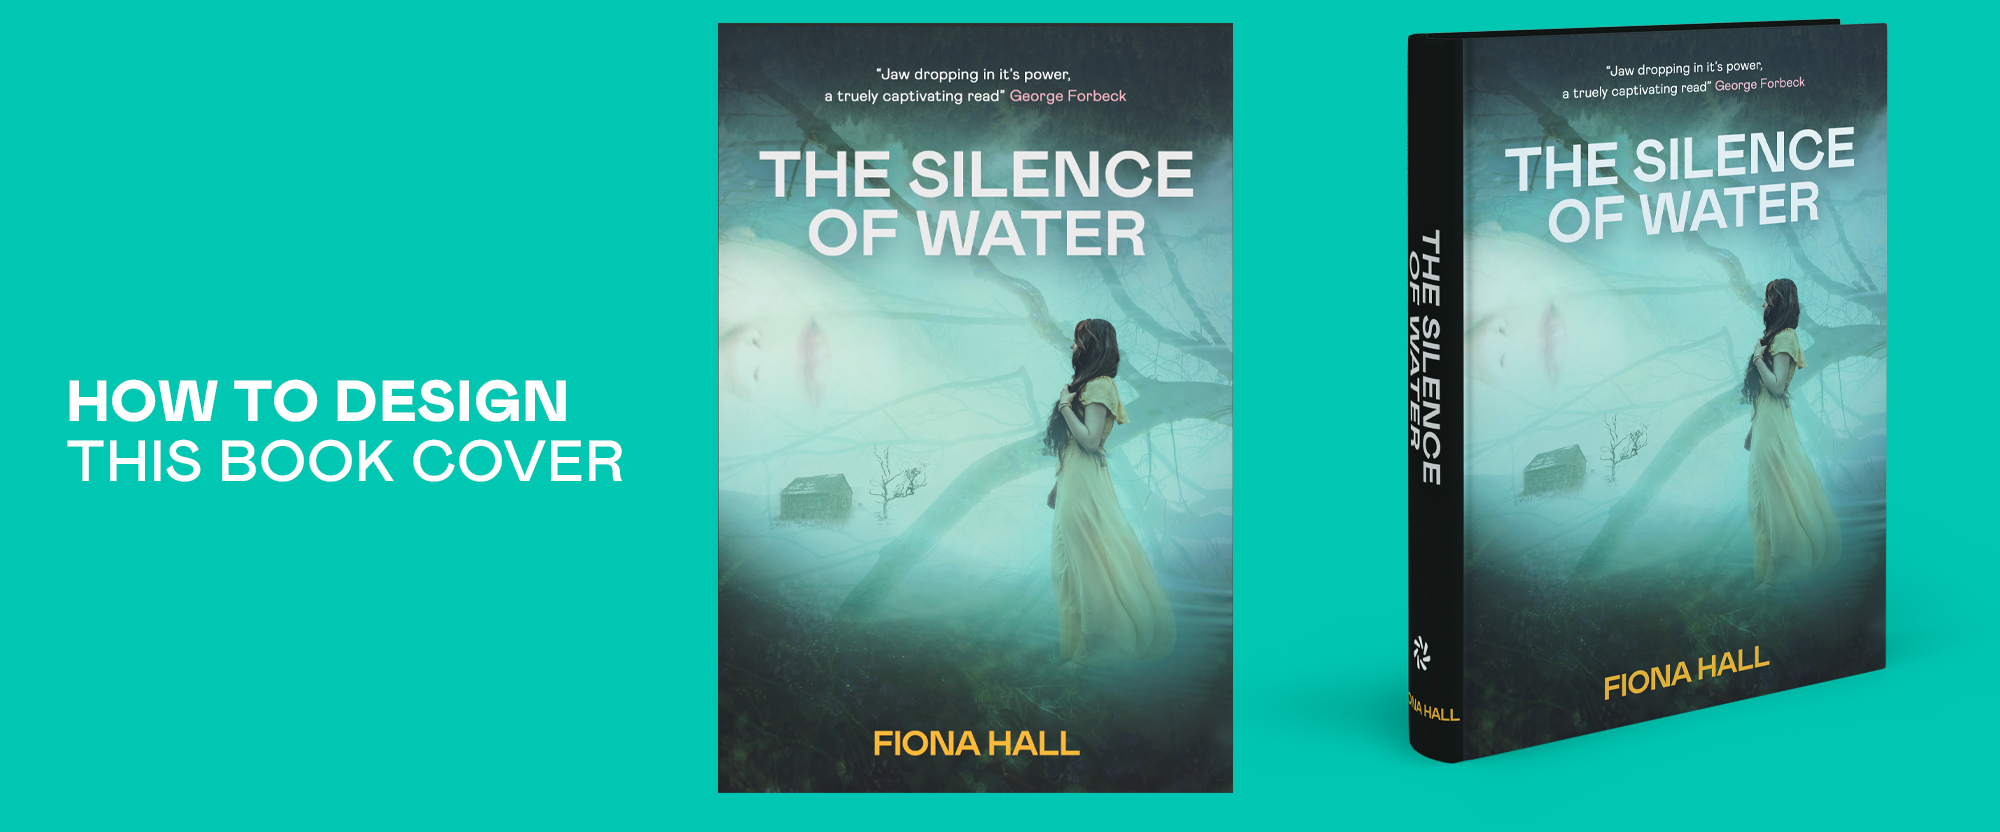
Over the last few years, I have been working with Penguin Publishing on a freelance basis creating all kinds of things from Audiobook covers to animated social posts, all centered around books. I think book covers can be a great addition to any design portfolio as it shows several different skills, they look cool and most importantly – they are fun to make! In this tutorial, I will detail how to design a book cover so that you can add this skillset to your resume and portfolio.
This book cover is obviously made up by me, the author, the title, the visual concept is all not real. So that really frees me and in turn, you, to establish what the story is for this book and what kind of visuals we would want to have on it. So for me this book is a murder mystery, perhaps in a remote area something bad has happened and it’s up to our hero to discover what. So the visuals that I am going to put together lend themselves to that air of mystery.
Setup the Photoshop PSD to design a book cover
Create a new Photoshop document with the resolution width of 1917px and height of 2868px, 350 DPI.
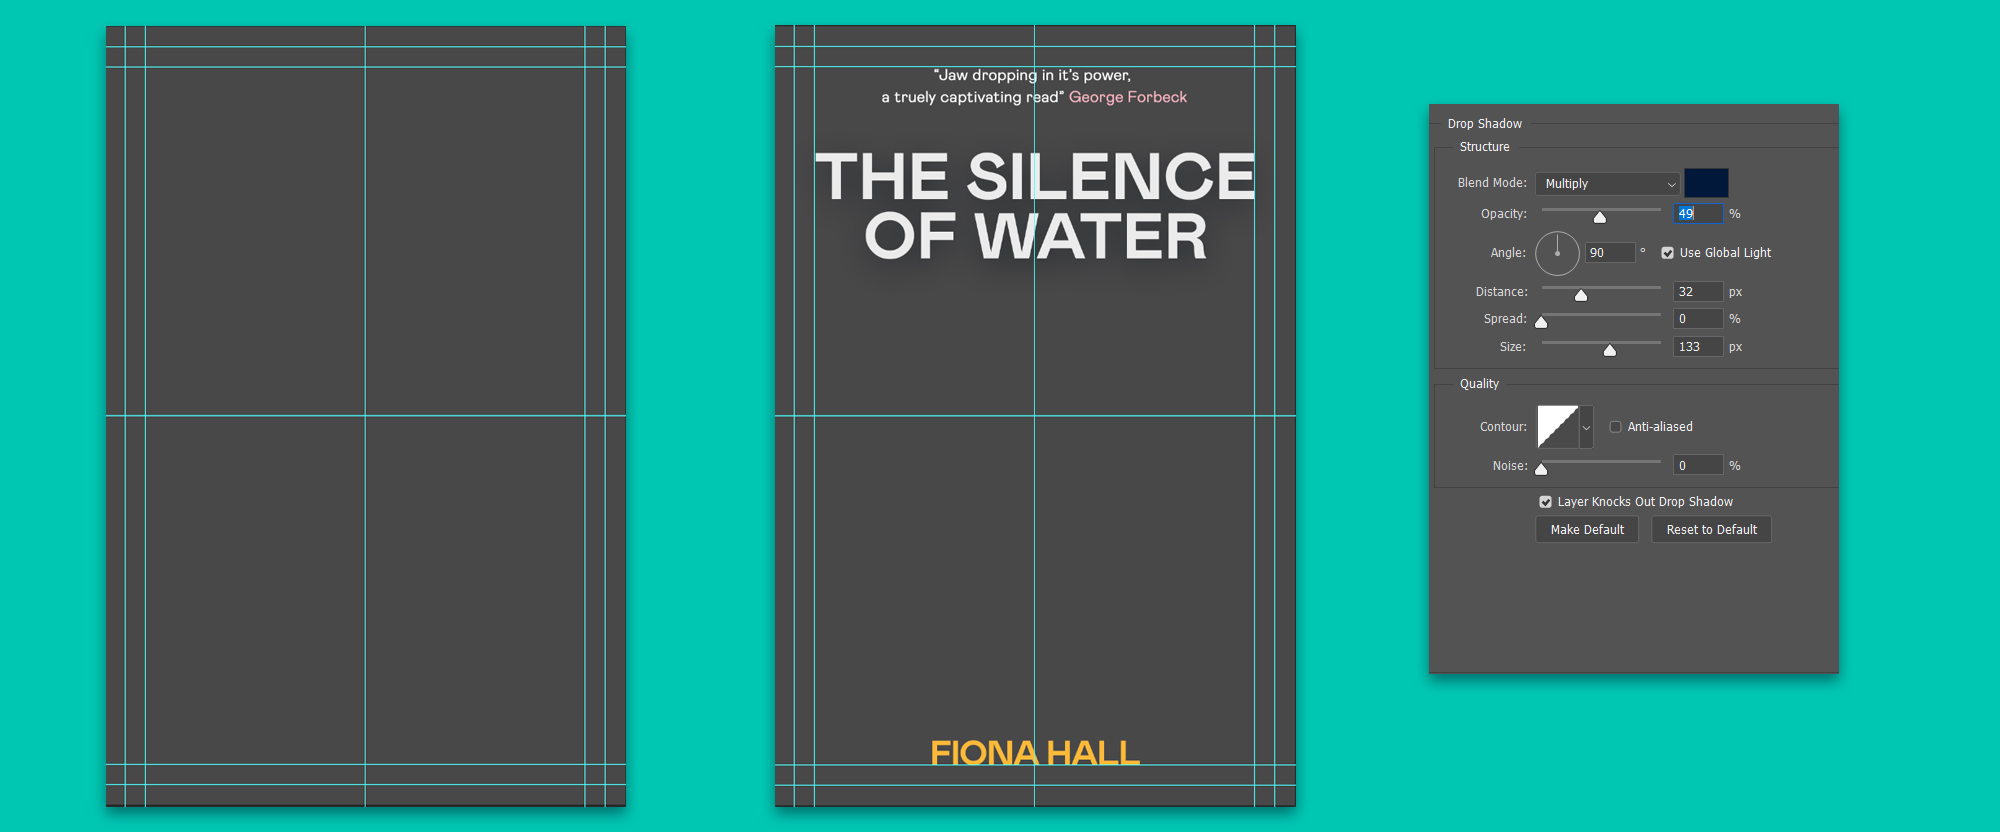
Now we are going to mark out our safe area to design in so that when printed our most important assets such as the Title are not cut off.
Go to the top of Photoshop to Window > Properties, then from the toolbar select the rectangle tool and draw out a rectangle. In the Properties Panel set the width to 74px and the height to 2868px. Set the color to a really vivid bright green. You want to purposely choose an awful bright color. The reason being is you don’t want to accidentally leave this layer turn on when saving out for print. This is just a guide layer so we definitely do not want it in our final design. If it’s super bright and looks horrible, we will not forget about it! We are going to use this rectangle as our measuring guide to lay out our Guides.
Put the rectangle along the left-hand side of your canvas. Use CTRL-R to bring up the rulers – you can drag guides out from these by clicking into the ruler and then dragging outwards. Drag a new guide so that it sits along the right-hand side of your green guide. Now move your green guide to the right, while holding Shift. So now the left edge of your green guide is touching the Photoshop Guide. Drag out another Guide from the Ruler.
You will need to do this exact same process for all sides of the canvas. Use CTRL-T to enter Transform mode and right-click to bring up a menu where you can Rotate by 90. This will help you in doing the top and bottom guides.
Once you have completed the guide layout, you can turn off the green rectangle in the Layers Panel and we can get started on the actual design.
Typography on the book cover
The typography we are going to use on this cover is fairly standard. My font of choice is Mabry Pro Light and Bold. With the quote at the top of the cover I have it written in white with the name in pink so that they are separated from each other but that I can still have them on the same line. This way I can have it across two lines and centered rather than three lines with the name below the quote. I have the font size at 11pt and line spacing at 16pt. So exact! I am using Mabry Pro Light for this text, but I wanted to beef it up just a little to make it a touch easier to read, so I am using Faux Bold which you can find in the Character Panel, just to add a little more weight to it.
For the main title, I am using Mabry Bold, 48pt, line-height 44pt. Now if you are using a different font when building this design, then the character values will be different than mine, so eyeball the size of your text. The things you should be looking at are, the quoted text should be small, the main title is the largest and the author name is something in between both. I’m using my guides so that the author text and the quoted text are touching the top and bottom guides respectively, and the title is touching the left and right guides. Finally, I have selected all three text blocks in the Layers Panel, then I went Window > Align and clicked center. Just to be absolutely sure that my text is centered with the guides and each other.
Add a background image
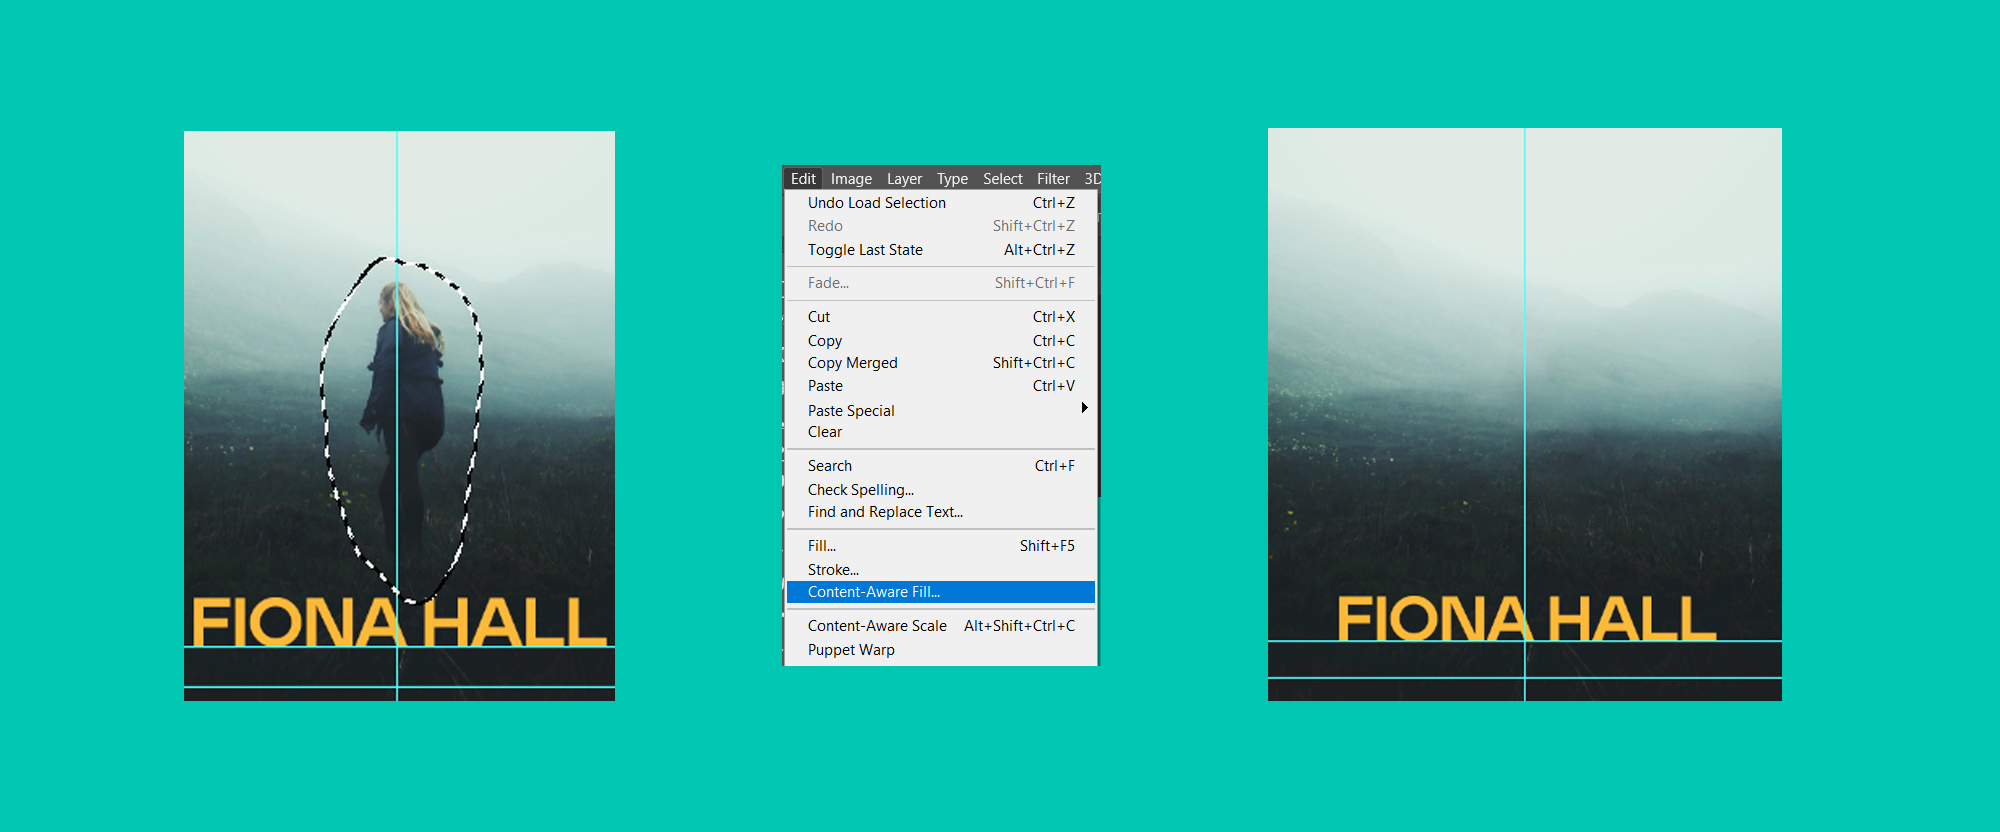
Click here to downloads the first image from Pexels. This image is going to be the base of our book cover. I have chosen it because it’s mostly clear of elements and gives a nice gradient of misty sky that we can build on. Once you have the first photo positioned underneath the text in the Layers Panel, we are going to want to remove the person in the photo. With the photo selected, right-click and select Rasterize image. We have to do this because we are going to use Photoshop’s AI to remove the person from the photo and it requires a rasterized image to do so. Now from the toolbar, select the Lasso Tool. Draw a loose circle selection around the person and then go Edit > Content-Aware Fill. When the Panel opens just click OK.
Add a point of interest to the book cover
We will be using this image from unsplash – so go ahead and download it now.
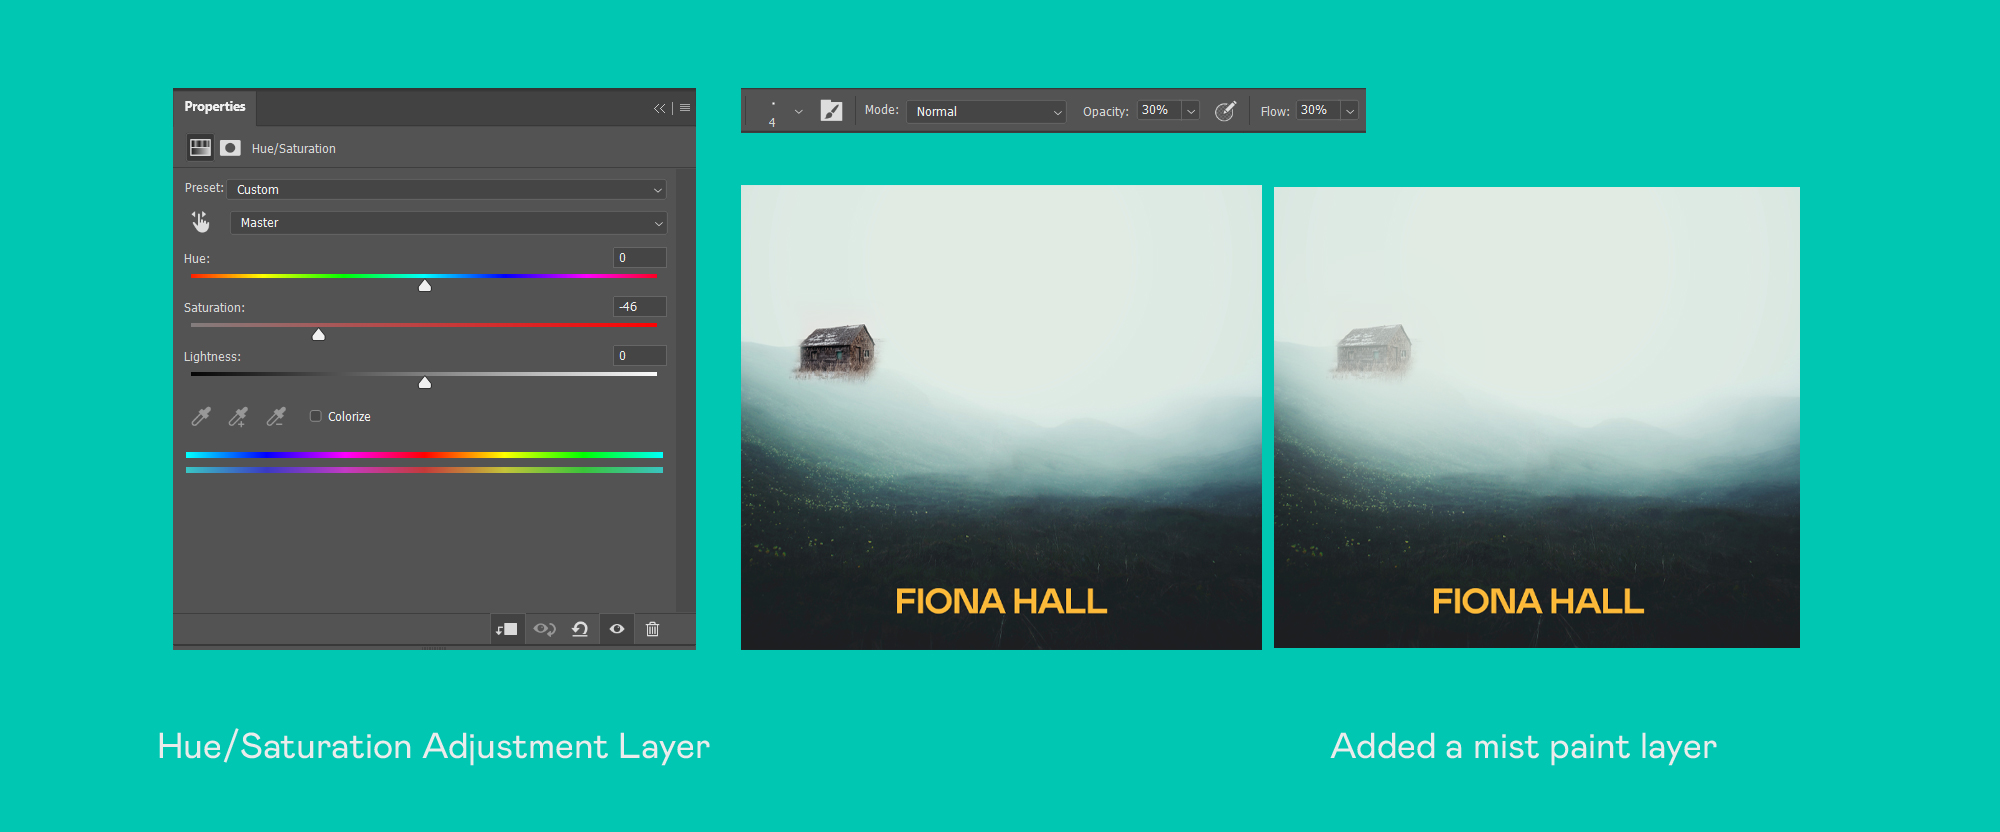
Next we are going to add a point of interest by adding in a little house. Drag in the house photo and scale it with CTRL-T so that it sits on the left-hand side, about a third of the way up the background. We will need to do a few things to this image so that it blends in with our background.
Using the Adjustment Layer icon at the bottom of the Layers Panel, select a Hue/Saturation Adjustment Layer and clip it to the house layer by right-clicking and selecting ‘Create Clipping Mask’. Double click on the icon of the adjustment layer within the layers panel to open its Property window. Let’s adjust the saturation to -46. I want the house to sink into the mist and as such removing the saturation can help with this.
Let’s paint a little mist on top of the house. If you get a soft brush, select some of the bright background sky color, set the Opacity of the brush and Flow to 30%. You can paint, on a new layer, over the house to add mist in front of it.
Add small details to the book cover
This image of an old weather-beaten tree is what we will be using for this step. Download it here.
Place the tree into your scene. Before you scale it down, go to Select > Color Range > and then paint the branches of the tree. Use the Eyedropper tool with the little plus next to it to add to your selection. Then click the mask icon on the Layers Panel to create a new mask using the selection you just made. So now we should only see our tree. Use a soft brush to tidy up any areas of the mask. Scale the tree down with CTRL-T. We are going to place it next to the little house.
Now it’s in place, again go to your mask and use a soft brush with a low Opacity and Flow to blend the bottom of the tree into the mist. It should feel like it is poking out of the mist around it.
Finally, go Image > Adjustments > Curves – this will add a curves adjustment to your tree image – because the tree was a Smart Object when you brought it in means that this adjustment is added to the bottom of your layer and you can tweak it any time you like. This is a non-destructive edit – which is the best kind of workflow.
Adjust the curve in the Properties Panel by moving the top point over towards the left-hand side – as you see in the example image. This makes it appear more faded.
Add a visual story element
Here’s the next image we are going to use on our book cover. Download here.
With this image I want to subtly show some part of the mystery. Perhaps this girl was the one who went missing that our hero is looking for? Either way, I want this image to be faded as if she is laying in water.
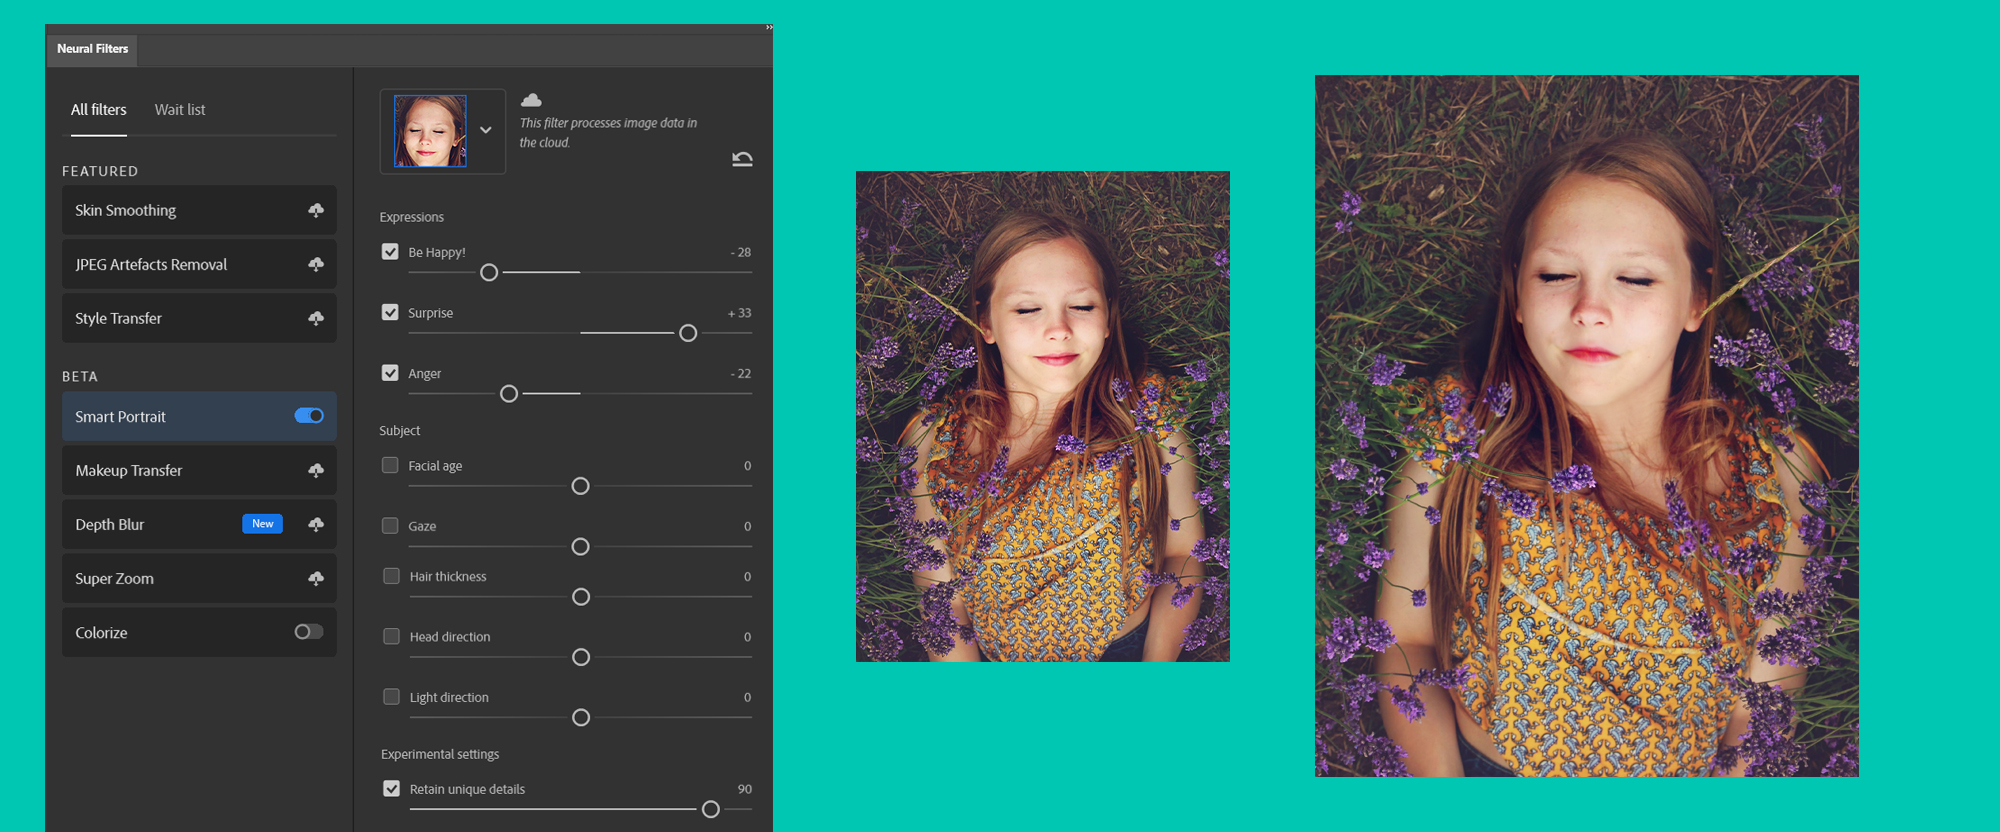
The first step might seem a strange one but I want to remove the smile. Because if our story is her going missing then we probably do not want her to be smiling about it!
Use Photoshop Neural Filters
So bring the photo into Photoshop. We need to give the Neural Filter a bit of a helping hand by rotating the canvas so that the image is the right way up. Then go Filter > Neural Filters. In the Beta tab select Smart Portrait. Feel free to play with these settings until you get a result you are happy with. It’s a fun tool to use! You can see my settings above. Click OK once you are happy. Now you will see that her new face is a layer above the original. I have just merged them together as I want to manipulate the photo as one from this point onwards. Select both layers and press CTRL-E to merge them together.
Right-click your layer and go Duplicate > then from the drop-down select your Book Cover PSD and click ok. This will send this layer to the Book cover PSD so you can place it there.
Place the story element
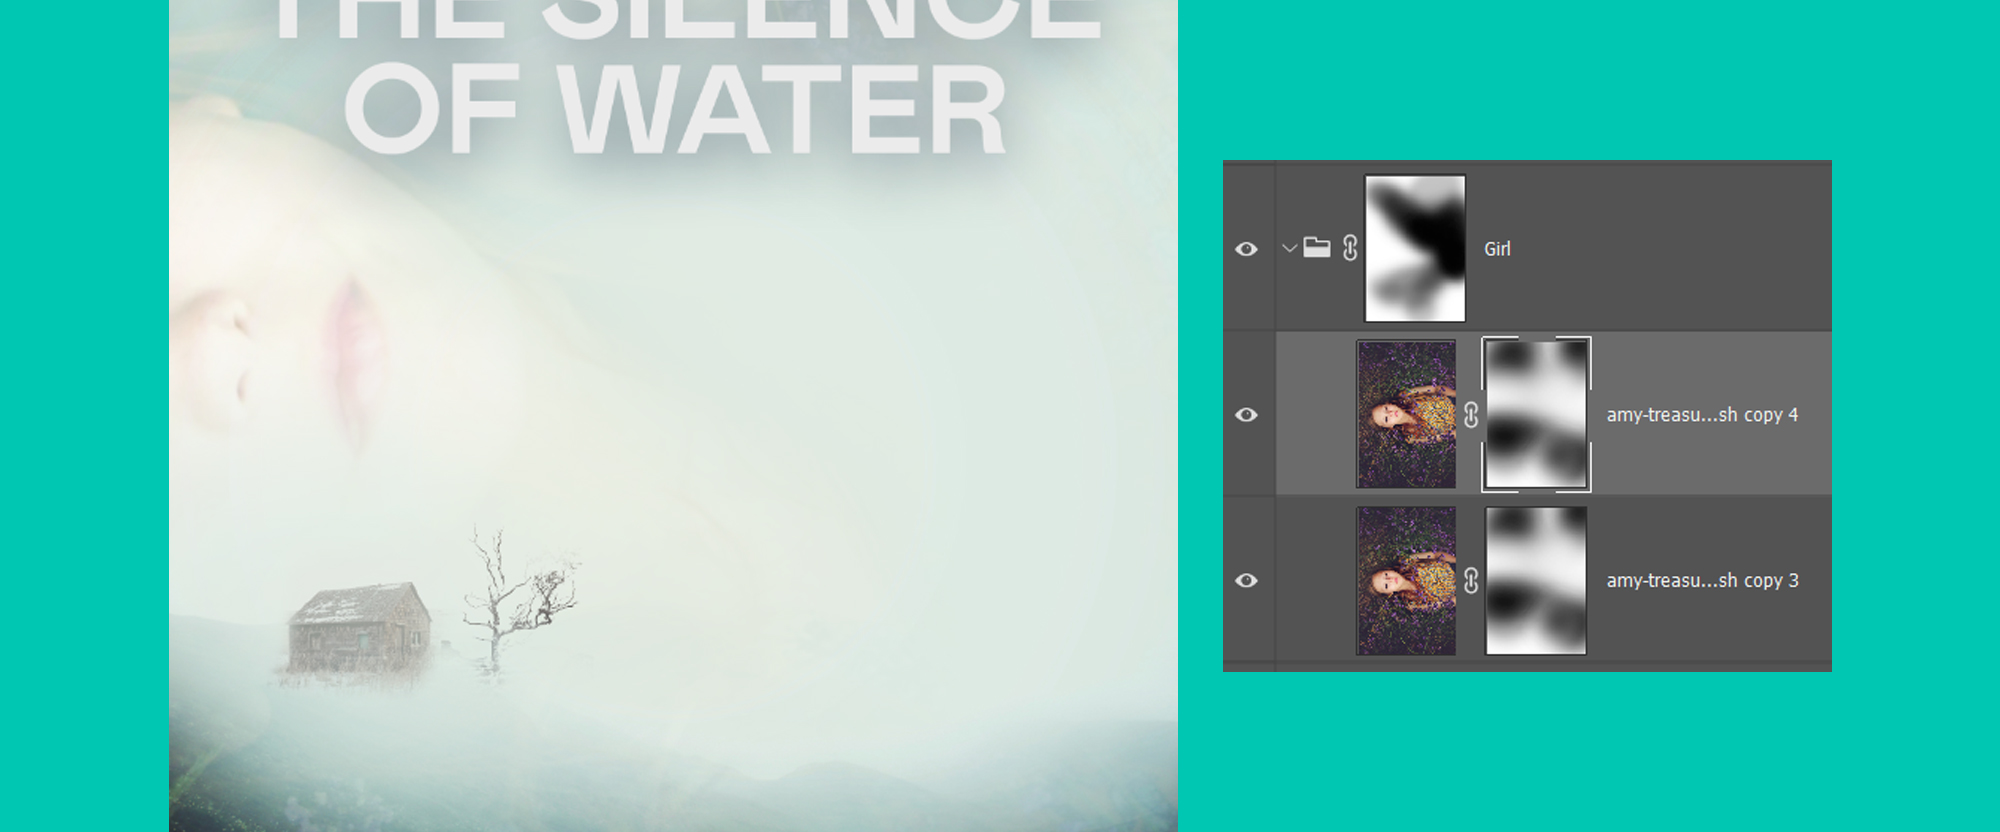
Rotate the girl so that her head is to the left of the book cover, and place it so that her eyes are cut off from the frame of the book cover. So now we just see her nose and mouth. Set this layer to Overlay. Make a mask on this photo and paint lightly so that only her head is peeking through the mist. I duplicated this layer to have another head on top just to add a little contrast in and then reduced the Opacity to 30%.
Often in book covers, we will not see people’s eyes on the actual cover. So any people placed on the book cover will often be facing away from us, or like this where the face is cut off to some degree. This isn’t a hard and fast rule and there are plenty of book covers that show people’s faces on there. But next time you are looking at Fiction books, look at the covers and see how many you can spot which have people facing away from you so that you can’t see their faces!
Add an element that hints at the surrounding environment
We will be using this image, which you can download from here.
Bring this tree image in to your Book Cover. CTRL-T to enter transform mode, and then right-click and select flip vertically. I have set this layer to Color Burn in the Blend Modes.
Add abstract elements to add visual interest
We will be using these water ripples, download them here.
I want to create the feeling that the girl is in the water and that the tree we just placed is actually a reflection on that water. To reinforce that idea I will add a few ripples to the surface by adding in this water photo and setting the Blend Mode to Lighten. Then I will use a mask to paint out any areas which feel a little busy.
Add an element to enhance readability
Here’s the next image to download.
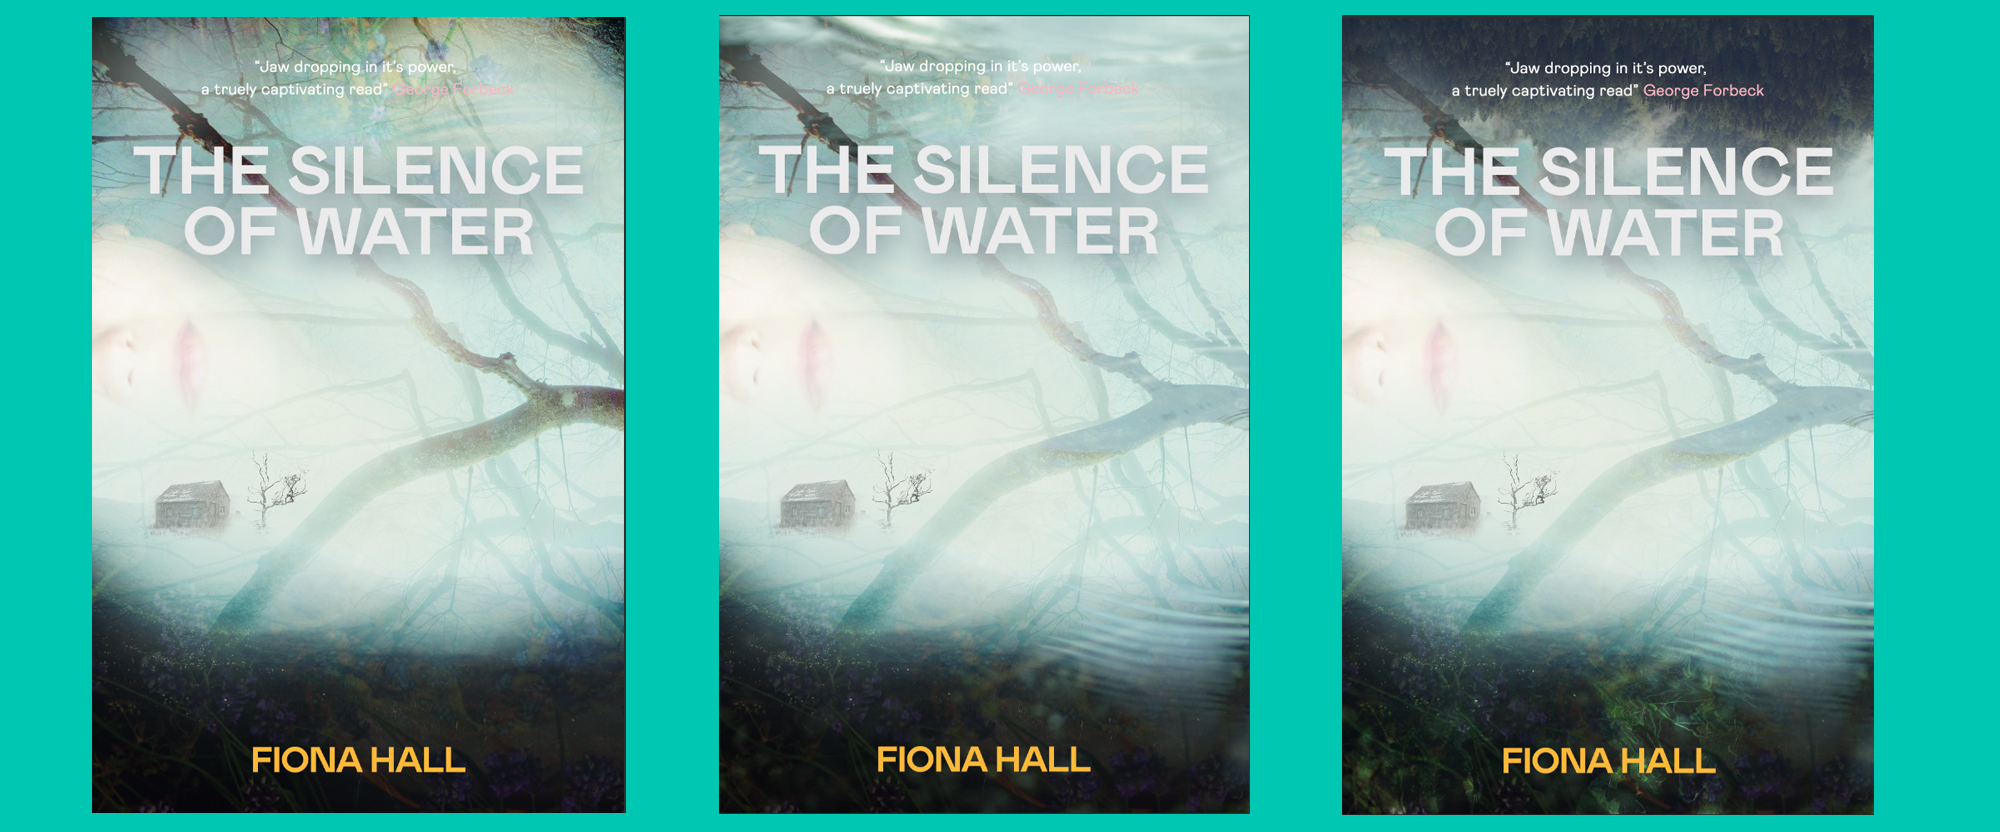
The next image is really straightforward. It’s of a forest hilltop, I have pressed CTRL-T to enter transform mode, then right-clicked and Flipped Vertically so that the trees are upside down. If you want to create a mysterious vibe, then turning imagery so that the brain has to work a little harder to understand them gets you a long way to achieving that. For instance, in this image we have the girl sideways, the tree trunk upside down and now the first upside down. Pair all of that with the mist and ripples and we are starting to get a mystery.
Place these forest trees at the top of the book cover and use a mask to gently fade them out so we can’t see any of the hard edges of the photo. Set the Blend Mode to Darker Color.
Color Correction
For the initial color correction I wanted to play with the contrast a little. Boost up the darkness so that the Copy has a little more readability to it.
Make a new Layer. And then using the Fill Tool from the Tool Bar, set the color to #dbe4d9 then change the blend mode to Pin Light and Opacity to 47%
Now make another new layer, set the foreground color to #23361f and then use the Fill Tool to fill the layer. Set the blend mode to Subtract. Now add a mask and paint the middle of the mask black. So essentially you are creating a vignette around your image.
From the Adjustment Layer icon at the bottom of your Layers Panel, create a new Curves Adjustment Layer and set the values as you see below image.

Add in a Foreground point of interest
We will be using this lady in the next part of the tutorial. Download it here.
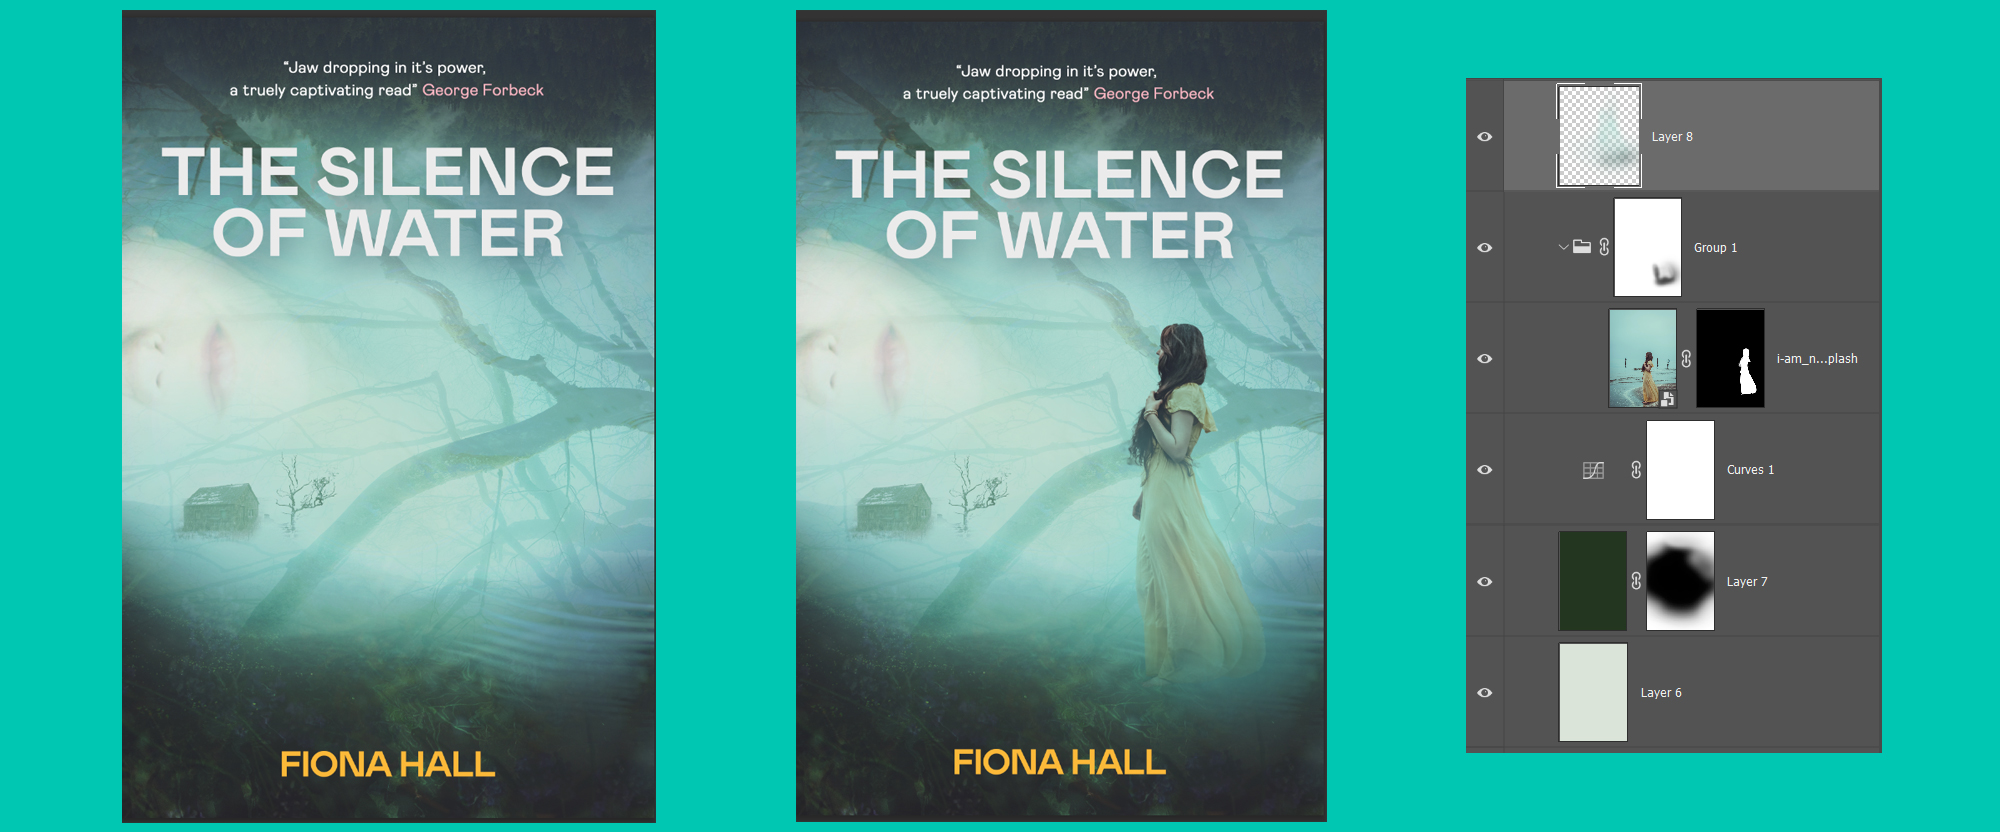
Place the lady into your Book Cover PSD. Select the magic wand tool in your Tool Bar and then go up to the top of the Photoshop Menu and click Select Subject. Photoshops Ai will automatically select your subject, click OK. If you want a more in-depth tutorial on this then I have one right here, that helps you to add people into images using Photoshop.
Then go to Select > Contract > enter the value of 1
Now go Select > Feather > Enter the value of 0.5
Hit the mask icon on the Layers Panel. I love how easy that process is now. It used to take a lot longer than that!
Put this lady into her own group and then add a mask to that group. In the mask, using a soft brush light paint at her feet and bottom of the dress, we want it to fade away a little so that the mist is coming in front of her.
Make a new layer above your group, hold ALT and color pick from the mist area of your image. Then using a soft brush paint over the top of your lady. It should be fairly subtle, so set your brush to Opacity 30% and Flow to 30%. It allows the color to be added gradually and you will have more control.
Another layer of color correction
This is the last part! We are now going to reduce the amount of red in the image as a whole using a curves adjustment layer – copy the Red Channel settings below. Then click the Adjustment Layer icon on the Layers Panel and click Photo Filter. In the Properties window select Underwater. This gives the whole image a blue tint which suits the mood quite nicely.
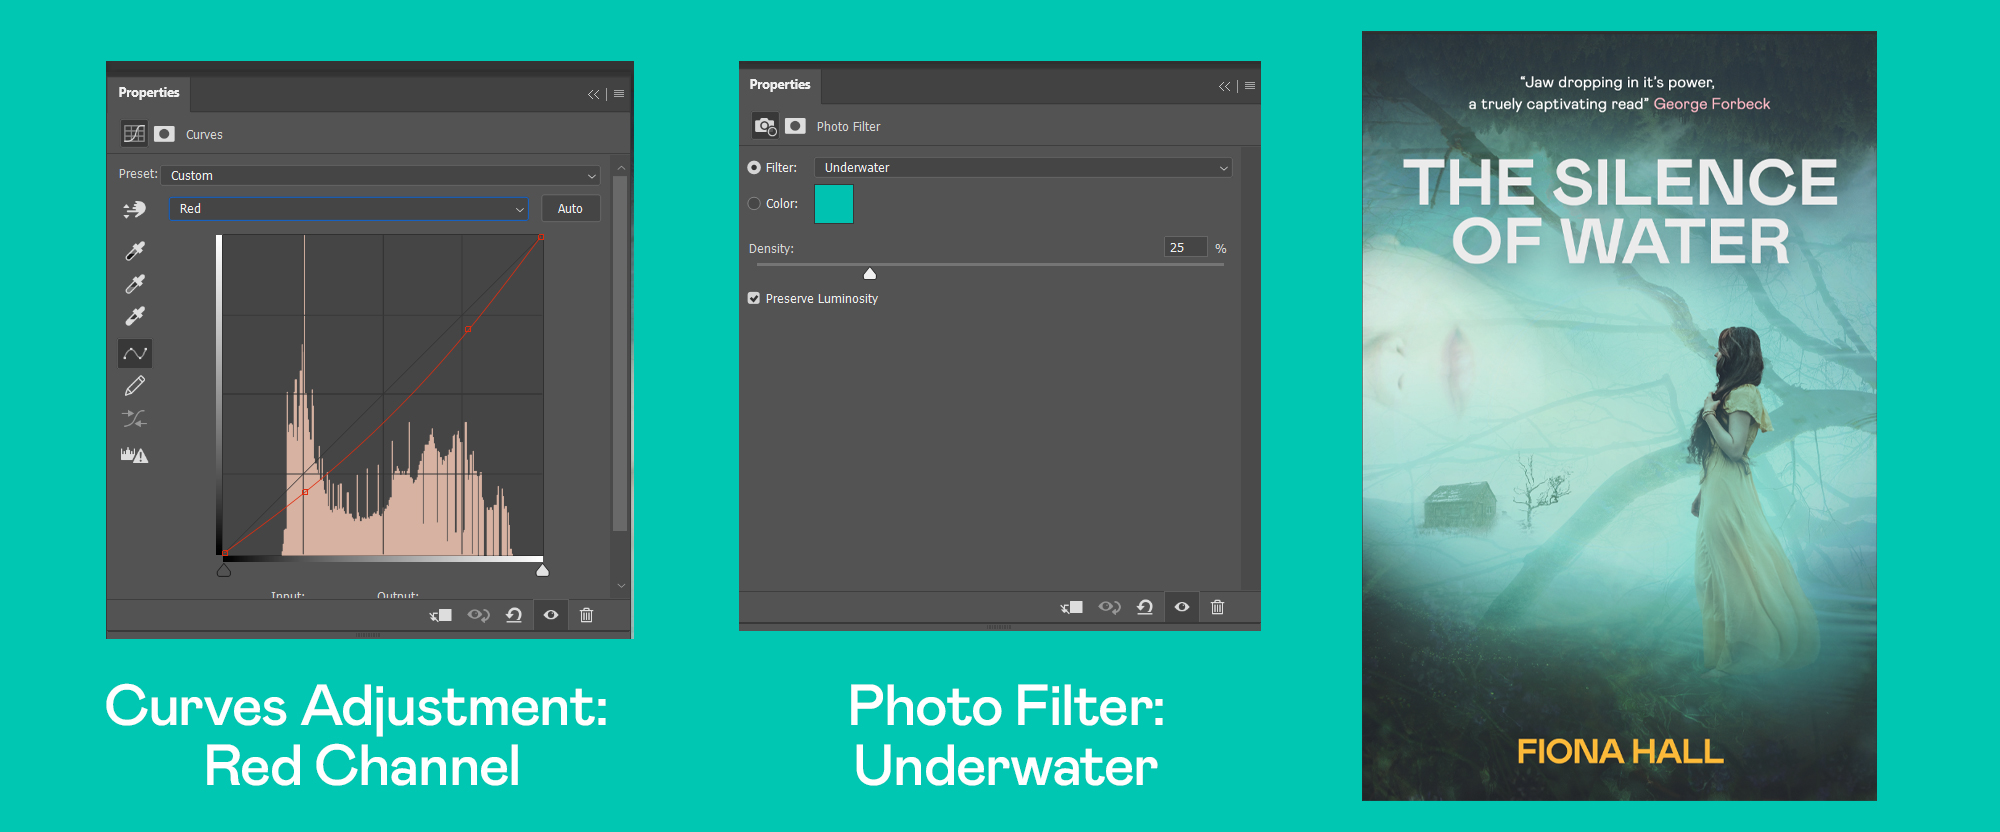
And here is the final book cover. I would love to see what Book covers you create!

One Response
Comments are closed.